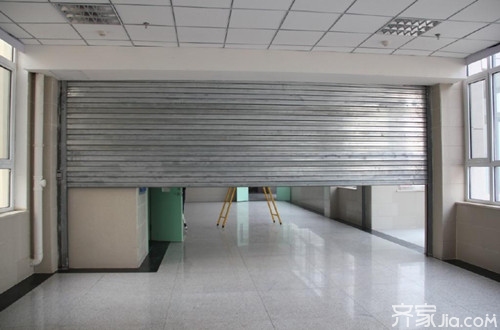
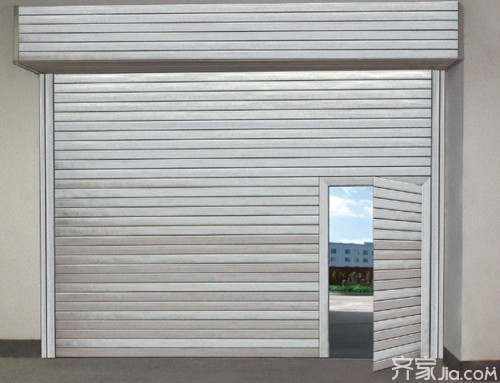
The fire shutter is a kind of fire prevention and heat insulation device suitable for large openings of buildings. The product adopts the characteristics of built-in reels in the design and has a reasonable and compact structure. The curtain of the fire-retardant curtain reaches the rise and fall of the roller blind through the transmission and the control system. It plays a role in fire prevention and fire isolation. The product has a flat appearance, a novel design, and a strong steel. The following small series describes the use of fire shutter doors and fire shutter doors.
Fire shutter door installation
The first step: install the guide
1. Determine the mounting position of the guide rails on both sides of the fire shutter door, release the guide rail reference line with the hammer, release the cross bolts of the guide rail connector fixing bolts, and the guide rails are not less than 75 cm above the ceiling.
2. Fix the expansion bolt hole with the impact drill on the wall post. The spacing between the connectors must not exceed 600 mm. The distance between the two ends of the guide rail is 100 mm. First, attach a few pieces of fasteners up and down, attach the rails, correct their vertical and spot welds, and then repeat the verticality of the rails after guiding and fixing. The verticality of the rails shall not exceed 5 mm per meter. The full-length verticality shall not exceed 20 mm. Embedded rail depth (see GBl4102-2005).
3, the rest of the connector is fitted, the connection between the connector and the guide adopts spot welding, the spot welding point between each connecting member and a guide rail is not less than 5 points, the spot welding width is not less than 5 mm, and the welding place should not be Wear phenomenon occurs. When stainless steel guides are used, the electrodes are made of stainless steel.
Step Two: Install Reels
1. According to the height of the design center of the reel in the large sample diagram, the center position of the active support plate is fixed on the column or wall, and the central reticle of the expansion bolt is released.
2. Based on the center of the main support plate, use the horizontal plastic pipe to find out the corresponding centerline of the driven support plate and the reticle of the driven expansion bolt hole.
3. Punching: Drilling the expansion hole with impact requires the drill bit to be perpendicular to the cylinder surface. If some screw holes touch the steel bar, the drill can not move properly, but it can not affect the firmness and appearance.
4, install straight support plate
(1) Install the active support plate (the drive frame is connected beforehand and welded on the support plate), tighten the expansion bolts that pass through the support platen holes with nuts, spring turns, and flat washers. The support plate surface is required to be perpendicular to the reel.
(2) Install follower bearing plate in the same direction as above, but before tightening the bolt, ask Chuan horizontal pipe to check whether the center height of the driven support plate is consistent with the active support plate, and the level is controlled within 1/300 of the height of the hole, such as Deviations are adjusted in time.
(3) With the weight of the entire door, some support plates are fixed with expansion bolts, but they are not stable enough. They should be supplemented with support or reinforcement ribs, fixed on the spot, welded, and fixed on the brick wall. bolt.
5, install the fire reel
(1) Before installing the reel, first attach the hanging plate to the reel, and then attach 4-6 pieces of the reel to the peg board and tighten the reel.
(2) When lifting the reel, be sure to pay attention to safety. Designate the person to command, the ladder, the scaffold, and the hand chain hoist must be inspected. When installing, first place the optical axis of the bearing and the seat into the spool hole, and tighten the bearing fixing bolt after aligning the position.
(3) After the reels are up, move the reel to the right or left to adjust the position. At the same time, review the level of the reel with a horizontal ruler and a horizontal tube. After the adjustment, the optical axis and the reel are fully welded and fixed, and the optical axis and the bearing are fixed with the head screws.
(4) When lifting the reel, special care should be taken not to damage the curtain that is wrapped around the shaft, and to use a wire rope for padding.
The third step: installation of pay-off axles
1. At the end of the door column, determine the height position of the secondary shaft, and release the reticle of the bearing plate bolt hole. Based on this, just find the center position of the secondary shaft of the door at the other end and discharge the cross thread of the bearing plate screw hole.
2. Hit the holes of the expansion bolts with impact drills. The upper expansion bolts are required to be the same as before.
3, on the bearing seat and pay axis, while reviewing the level of flatness, operation with the scroll. Step 4: Install the fire shutter door motor Put the chain on the sprocket on the bracket first. Before fixing the drive base, put the chain on the small sprocket, and then tighten the fixing bolts. Then the dither chain can make the spool rotate.
Step 4: Panel Installation
1. First, loosen a few curtains on the roller blinds, and use the horizontal pipe. The unevenness of the roller blinds checked by the ruler is no more than 1/300th of the height of the hole. If the tilt is poor, find out the reason and adjust.
2. Use the reels to rotate, put on the curtain, and finally install the curtain bottom beam. Pay attention to the head when using the top curtain. In addition, if you wear the remaining curtains in advance, you should pay special attention to the movement. Do not make the panels deform when they are bundled.
3, check the rails on the arc curved mouth is appropriate, and then roll down, walk around to observe whether the phenomenon of card owners.
Step 5: Install the roller bracket design
When installing the supporting roller bracket design, when installing the supporting roller, first determine the position of the bracket on the wall posts on both sides of the door. After the brackets are installed, the support rollers are set. The height and level of the center of each roller should be unified and fixed.
Step 6: Install the electric control box, lock box, etc.
1, according to the requirements put the lock box, electric control box screw hole cross line, drill with impact drill. Lock box, the installation of electric control box to be vertical, with M6 or M8 bolts, fixed firmly.
2. Install the electric wire tube to connect the lock box and the electric control box. The two ends of the electric wire tube are screwed tightly with special nuts. If necessary, copper joints can be used to connect the wires. The distance between the wire tube clamps should not exceed 100cm.
3, installed electrical control board, limiter.
4ã€Connect the electrical connection line, switch off the line, power line, signal line, etc., the connection standard is operated according to the “Low Voltage User Electrical Device Specificationâ€, the two wires inside the metal hose are wrapped with plastic pipe or yellow wax pipe, and the ground wire is double-colored. Line, pay special attention to the grounding wire must be firmly fixed.
5. Turn on the power and manually put down the shutter button on the third button to adjust the upper and lower limits. Then operate the roller blind to walk up and down several times to check if the roller blind operation is stable.
Step 7: Install the fire wall
1. Place the fireproof partitions on the position line. The firebreak partition walls should be as close as possible to the reels and guide rails without affecting the roller blinds.
2. According to the release line, use the impact drill on the side of the wall and fix the expansion bolt at the top.
3. The fireproof board is installed in the angle frame and welded and fixed. The installation of the firebreak partition wall is required to be straight and secure.
Fire shutter door use range
It is mainly used in large-scale supermarkets (large shopping malls), large-scale shopping malls, large-scale professional materials markets, large-scale exhibition halls, factories, warehouses and other public places where fire protection is required. When a fire alarm occurs, the fire shutter doors are automatically lowered (downwards) according to a pre-set procedure under the control of a fire control system. This prevents the spread of flames to other areas and provides valuable time for fire fighting.
Under normal circumstances, large buildings are equipped with a central fire control system in accordance with the requirements of the National Fire Protection Act. When a fire occurs, the smoke sensor installed on the roof (simply referred to as smoke) first receives the smoke signal and alarms the central control system at the same time. The fire control central control system turns on the fire shutter door power in the area where the fire is located to make the fire. The fire shutters in the area descend at a certain speed. When the curtain descends to a position of about 1.5 meters from the ground, it stops to descend to facilitate the evacuation and evacuation of personnel. After the fire shutter door stays in the middle for a certain period of time, it continues to descend until it is closed. The speed and intermediate dwell time of the fire shutter doors can be adjusted during installation.
In some occasions, the fire control central control system is not provided in the building. The fireproof rolling shutter door can only achieve the fire protection rolling operation procedure of the fire shutter door by means of the fire control electrical box of the fire shutter door. In this case, when a fire alarm occurs, the fire alarm signal received by the smoke sensor passes directly to the fire control electrical box of the fire shutter door.
Editor's summary: About the use of fire shutter doors and fire shutter doors are introduced here, I hope to help everyone. If you want to know more related information, you can pay attention to this website information.
Shutter doors
Wall Mounted Shower Arm
Brass rainshower arm wall mount for overhead rain Shower Head in chrome
Conncetions Size :1/2" , Length: with cover plate
Made of solid brass&stainless steel , Chrome finished
Brass chromed wall mounted shower arm for bathroom shower head
Material
Solid brass H59
Sureface finish
Chrome
Item weight
0.45kg
Product dimensions
40cm
Origin
China ,Guangdong pronvince
Installation method
Wall-mounted
Item package quantity
1pcs
Special features
Easy to Install
usage
Compatible wall mount shower head
MOQ
100PCS /Cartons
Delivery date
sample 1-3days we can send out to you ,MOQ order 5-10days can shipping out
Payment terms
if sample we accept paypal , MOQ order pay by T/T Bank 30% deposit ,before shipping finish balance 70%
Shower Arm
Shower Arm,Chrome Shower Arm,Gooseneck Shower Arm,Shower Head Arm
KaiPing HuiPu Shower Metalwork Industrial CO,LTD , https://www.hp-shower.com